Floor Marking Guide: A Step-by-Step Approach to Safety
Ensuring a safe and efficient workplace is essential in any industrial setting. One of the most effective ways to enhance workplace safety is through floor marking. Whether you’re working in a warehouse, factory, or any other industrial environment, a floor marking guide can help you implement clear, visible markings that promote organization and safety. In this blog, we will take you through a comprehensive guide to floor marking, including safety color codes, materials, and effective application.
1. Introduction: Why Floor Marking Matters for Safety
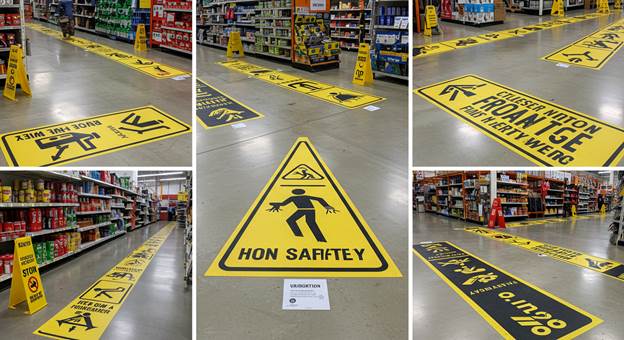
Floor marking plays a critical role in directing foot traffic, identifying hazardous areas, and maintaining clear paths for emergency situations. Effective floor markings reduce confusion, help workers stay safe, and ensure smooth operations. Clear markings in industrial settings help demarcate work zones, storage areas, and potential danger zones, providing immediate clarity to all employees.
At Archford, we understand the importance of using reliable and durable products to ensure your workspace remains safe. Check out their comprehensive floor marking guidelines to help you get started.
2. Step 1: Choosing the Right Floor Marking Materials
Before you begin marking your floor, it's important to choose the right materials for the job. There are various options, each suited for different environments:
-
Paints and Coatings: Often the most economical and permanent choice, suitable for areas that require long-lasting markings.
-
Floor Tape: A convenient option for temporary or frequently changing markings. It can be easily applied and removed without causing damage to the floor.
When choosing between these options, consider the warehouse floor traffic, the durability required, and how often the markings might need to be updated. For heavy-duty industrial applications, Archford offers a range of reliable floor marking products that stand up to tough environments.
3. Step 2: Decoding Floor Marking Color Codes for Safety
One of the key components of a good floor marking guide is understanding the color codes for safety markings. Each color represents a specific function, making it easy for employees to navigate hazardous or important areas quickly.
Here’s a quick guide to standard floor marking colors:
-
Yellow: Used for caution and warning. This color typically marks aisles, walkways, or areas with moderate danger.
-
Red: Indicates danger or emergency. It is used for fire exits, fire extinguishers, or other critical safety areas.
-
Blue: Used for informational purposes, such as equipment storage or maintenance areas.
-
Green: Represents safety. Emergency exits or first aid stations are usually marked with green.
The OSHA floor marking guide suggests using these color codes to maintain clarity and safety in your workplace, ensuring compliance with federal standards. If you're unsure which colors to use in your facility, Archford provides detailed recommendations for choosing the correct colors based on your workspace.
4. Step 3: Applying Floor Markings Effectively
Now that you've selected your materials and colors, it’s time to apply the markings. Here's a step-by-step guide on how to do it effectively:
-
Prepare the Surface: The first step is to ensure that the floor is clean and dry. Dirt or moisture can interfere with adhesion, so clean the area thoroughly before beginning.
-
Use Templates and Measuring Tools: Templates ensure that your lines are straight and consistent. Use measuring tools to ensure that each marking is placed in the right spot.
-
Apply the Markings: Whether you're using tape or paint, make sure to follow the manufacturer's instructions for application. Use a paintbrush, roller, or spray can for smooth, even coverage.
-
Allow the Markings to Dry: If you’re using paint, be sure to give it time to dry. This prevents smudging and ensures long-lasting durability.
-
Check for Accuracy: Once the markings are dry, inspect them to ensure everything is straight and visible.
Remember that following proper industrial floor marking guidelines ensures that your workspace remains safe and organized. Archford offers a range of floor marking tools that help you apply markings accurately and efficiently.
5. Step 4: Maintaining Your Floor Markings
Floor markings need regular maintenance to ensure they stay visible and effective. Over time, markings can fade due to traffic or cleaning, and may need to be reapplied.
Here are some tips for maintaining your floor markings:
-
Regular Inspections: Conduct regular inspections to ensure that your markings are still visible and intact. If you notice any markings that have faded or worn down, they should be touched up or reapplied.
-
Reapply as Needed: Depending on traffic levels and the material used, you may need to reapply your warehouse floor markings periodically.
-
Clean the Marked Areas: Cleaning the floor area around the markings can help preserve their durability. Use cleaning solutions that won’t damage the paint or tape.
By keeping your markings in top condition, you ensure that your workplace remains compliant and safe at all times.
6. Step 5: Floor Marking Guidelines for Compliance
Using a floor marking guide is not just about keeping your workplace organized—it’s also a matter of legal compliance. Many industries have floor marking requirements to ensure safety and efficiency. For example, OSHA mandates specific safety regulations that can be adhered to with the proper use of floor markings.
The OSHA floor marking guide outlines key rules for using floor markings to indicate hazards, pathways, and storage areas. By following these guidelines, you can ensure that your business stays compliant and avoids potential fines.
For businesses operating in industrial settings, adhering to industrial floor marking guidelines is critical for maintaining safety standards and protecting employees from injury. Archford helps businesses stay compliant with these regulations through their high-quality products and comprehensive guides.
7. Benefits of Following a Floor Marking Guide for Your Facility
By following a floor marking guide, you are improving your business in several ways:
-
Improved Safety: Proper markings reduce the risk of accidents and injuries by clearly identifying hazards.
-
Increased Productivity: When workspaces are organized with clear markings, employees can navigate the area faster, reducing downtime and increasing productivity.
-
Compliance with Regulations: Following floor marking standards ensures compliance with safety regulations, avoiding potential fines.
-
Clear Communication: Floor markings provide an easy, visual way of communicating safety information to employees, which is much faster than verbal instructions.
8. Download Your Free Floor Marking Guide from Archford
If you want to make sure your floor markings are done right, download Archford's free floor marking guide. This guide will provide you with all the tools, tips, and information you need to create a safe and organized environment.
Visit Archford to access your free floor marking guide and start improving the safety and efficiency of your workspace today!
Explore More: Essential Guides for Workplace Efficiency and Safety
|
Guide |
|
|
5S Colour Code Chart: Visual Standards for Safety |
|
|
Ammonia Pipe Marking Chart: Identification & Safety |
|
|
Floor Marking Guide: Organize Your Facility Clearly |
|
|
Fixed Asset Management Guide: Track & Maintain Assets |
|
|
Social Distancing Reference Guide: Workplace Safety |
|
|
Facility Visual Communication Checklist Guide: Ensure Compliance |
|
|
Total Productive Maintenance Guide: Boost Efficiency |
9. Conclusion
To sum up, effective floor marking is a vital part of creating a safe, efficient, and compliant workplace. By following the steps outlined in this blog—choosing the right materials, understanding color codes, applying markings properly, and maintaining them—you can improve the safety and functionality of your space.
For more information and to access high-quality products, visit Archford and explore their range of floor marking solutions designed to help your facility stay safe and organized.
10. Frequently Asked Questions (FAQs)
Q1: Why is floor marking important for safety?
Floor marking helps prevent accidents by defining clear pathways, warning of hazards, and identifying safe zones in the workplace.
Q2: How do I know which colors to use for my floor markings?
Each color represents a specific function. For example, yellow is for caution, red for danger, blue for information, and green for safety.
Q3: What are the OSHA requirements for floor markings?
The OSHA floor marking guide specifies the use of color codes and clear marking in high-traffic or dangerous areas to ensure safety compliance.
Q4: How can I maintain my floor markings?
Inspect your markings regularly, clean them as needed, and reapply when they start to fade or wear out.
Q5: Where can I download a floor marking guide?
You can download a free floor marking guide from Archford .


